在啟動的時候,添加呼叫ctfmon.exe,目前查到最能解決問題的方法
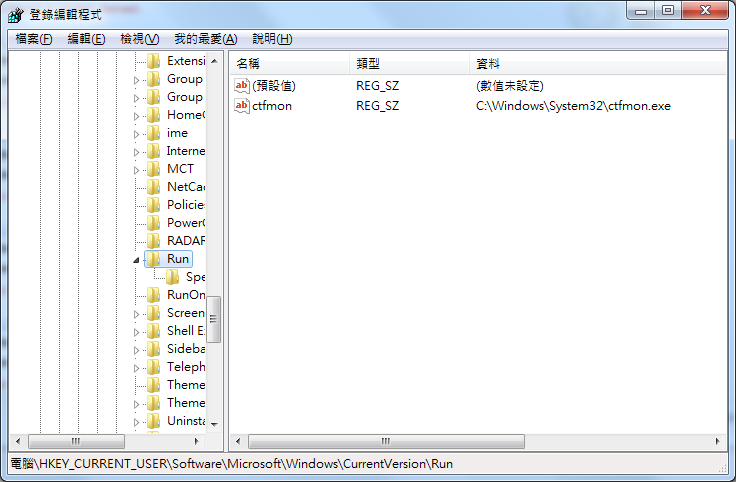
在啟動的時候,添加呼叫ctfmon.exe,目前查到最能解決問題的方法
來源出處:https://www.cnblogs.com/edielei/p/4856532.html
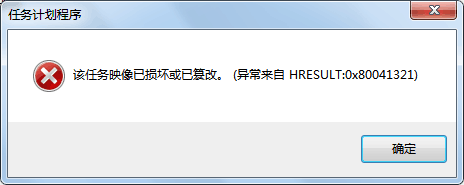
把系统升级到Windows 10,体验了一番Windows 10。感觉不怎么好用退回到了Windows 7,发现我原来自定义的任务计划没有按时执行,于是打开任务计划,弹出了下面的对话框【该任务映像已损坏或已篡改。(异常来自HRESULT:0x80041321)】。
解决办法:
1. 以管理员身份运行命令提示符并执行命令
chcp 437
schtasks /query /v | find /i “ERROR: Task cannot be loaded:"
2. 该命令将返回损坏的任务计划程序名称.
3. 请记录下损坏的计划任务名称.英文貌似是 cannot be loaded ,记不清楚了。
上面方法来自:http://m.blog.csdn.net/blog/nxeexn/7058470
当然这里我们不使用这个网页里面的方法。但请先完成上面的操作,找出错误的任务计划名称。然后我们一个一个找出来进行修复。


如上面所示,如SessionAgent这个任务损坏
① 我们需要到C:\Windows\System32\Tasks 这个文件夹里面进行搜索,把它所在的文件夹记录下面。
对应在任务计划里面的位置是:Microsoft\Windows\SideShow。
② 我们把这个SessionAgent的文件,剪切到别的地方,对的!是剪切,不是复制。比如剪切到桌面。
③ 把SessionAgent这个文件改成SessionAgent.xml,把文件改成XML文件。
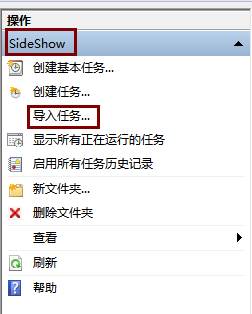
④ 再到任务计划里面定位到刚才的位置:Microsoft\Windows\SideShow
点击导入任务,把刚才桌面的SessionAgent.xml导入即可。如果导入时弹出错误对话框,一般是版本号不对,我们直接打开文件,把里面的版本号修改一下即可。
如上图,把1.5改成1.3就可以了。记得保存文件(Ctrl+S)!然后再次导入,然后就成功把任务导入进去了。
然后对每一个损坏的任务都需要这样的操作。不小心导入错位置其实也可以的。任务计划里面的文件夹的位置其实只是为了方便管理而已。
方法就是这么简单,把所有损坏的任务一一恢复。然后就不会再弹出第一个图片那个错误了。
來源出處:https://blog.csdn.net/tianzhu123/article/details/8060468
原因分析:
1、Win7操作系统,默认禁用了管理员和来宾账户
2、无法访问共享的机器,访问共享文件时使用的是默认的管理员,没有设置密码由于win7共享服务器端的同名账户是禁用的,当客户端还用同名账户(普遍来说都是administrator账户同名)去验证的时候,服务器返回这个账户禁止,客户端就不提示用户输入用户名和密码,直接终止就了共享访问…..
解决办法:
方法1:最简单的解决方法就是——本机建立一个新账户,这样通过新账户而不是同名的admin账户去访问共享服务端就不会出现“登 录失败:禁用的当前账户”,会直接提示输入密码
方法2:修改服务器端的访问模式,让everyone都能访问、客户端以guest登
方法3:使用windows的cmd,输入net use \\ip\共享文件夹 /user:用户名后回车后输入密码 注意是net use 不是net user 这时候再通过\\ip就能访问共享文件夹了….重启电脑以后就能再访问共享文件夹就能输入帐号密码了
來源出處:http://kamilia1470.pixnet.net/blog/post/213455875-delphi-thread-%E7%94%A8%E6%B3%95
Delphi 執行緒(Thread) 用法
使用Thread 必須使用繼承
最基本的Thread 繼承Type 寫在下面方便下次要複製用
type
TCustomThread = Class(TThread)
private
protected
procedure Execute; override;
public
constructor Create(XXX:String);
Destructor Destroy;
end;
…
{ TCustomThread }
constructor TCustomThread.Create(XXX:String);
begin
inherited Create(False);
FreeOnTerminate := True;
end;
destructor TCustomThread.Destroy;
begin
inherited;
end;
procedure TCustomThread.Execute;
begin
inherited;
end;
//使用該類別用法
with TCustomThread.Create(‘test’) do begin //建立
OnTerminate := ThreadOnTerminate; //結束後觸發的副程式 //procedure TForm1.ThreadOnTerminate(Sender: TObject);
Resume; //下Resume 才會執行Thread的Execute
end;
來源出處:http://www.programmer-club.com.tw/ShowSameTitleN/delphi/6493.html
2002/3/16 上午 09:36:50
感謝你… *^_^*
unit Unit2;
interface
uses
Windows, Messages, SysUtils, Classes, Graphics, Controls, Forms, Dialogs,
StdCtrls, Db, DBTables;
type
TTestThread = Class (TThread)
private
FQuery:TQuery;
FEdit:TEdit;
{ Private declarations }
protected
Procedure Execute;Override;
public
{ Public declarations }
Constructor Create(ltb:TQuery;url:TEdit);
end;
TForm2 = class(TForm)
DataSource1: TDataSource;
Database1: TDatabase;
Edit1: TEdit;
Query1: TQuery;
Session1: TSession;
procedure FormCreate(Sender: TObject);
private
{ Private declarations }
public
{ Public declarations }
test1:TTestThread;
end;
var
Form2: TForm2;
implementation
uses unit1;
{$R *.DFM}
Constructor TTestThread.Create(ltb:TQuery;url:TEdit);
begin
inherited Create(False);
FQuery:=ltb;
FEdit:=url;
FreeOnTerminate:=True;
end;
Procedure TTestThread.Execute;
begin
FreeOnTerminate:=True;
with FQuery do
begin
FQuery.Close;
FQuery.sql.Clear;
FQuery.sql.add(‘select url from url’);
FQuery.open;
end;
while not FQuery.Eof do
begin
Form2.Edit1.Text:=FQuery.fieldByName(‘URL’).AsString;
FQuery.Next;
end;
end;
procedure TForm2.FormCreate(Sender: TObject);
begin
test1:=TTestThread.Create(Form2.Query1,Form2.Edit1);
end;
end.
來源出處:https://bbs.csdn.net/topics/60105119
procedure TForm1.DBGrid1DrawColumnCell(Sender: TObject; const Rect: TRect;
DataCol: Integer; Column: TColumn; State: TGridDrawState);
begin
if adoquery1.RecNo mod 2=1 then
begin
dbgrid1.Canvas.Brush.Color:=clMoneyGreen;
end
else
begin
dbgrid1.Canvas.Brush.Color:=clSkyBlue;
end;
dbgrid1.DefaultDrawColumnCell(rect,datacol,column,state);
end;
隔行换色,我在用.
來源出處:https://dotblogs.com.tw/topcat/2009/08/06/9906
[SQL]為查詢的結果加上序號(ROW_NUMBER,RANK,OVER)
在MS SQL2005以後,增加了一些幫查詢結果加上序號的函數
以下的範例使用北風(NorthWind)資料庫
介紹如下:
1.ROW_NUMBER
依照指定的欄位排序,並逐筆加上順號的方式
例如:
SELECT
	ROW_NUMBER() OVER(ORDER BY CustomerID) AS ROWID
	,*
FROM Orders

2.RANK
依照排序的欄位,相同的資料相同排名,下一個不同會【跳脫】
SELECT
	RANK() OVER(ORDER BY CustomerID) AS ROWID
	,*
FROM Orders

3.DENSE_RANK
依照排序的欄位,相同的資料相同排名,下一個不同會【不跳脫】
SELECT
	--ROW_NUMBER() OVER(ORDER BY CustomerID) AS ROWID
	--RANK() OVER(ORDER BY CustomerID) AS ROWID
	DENSE_RANK() OVER(ORDER BY CustomerID) AS ROWID
	,*
FROM Orders

小喵筆記一下以免忘記
來源出處:
http://xdeath.dyndns.pro/read.php?62
以PHP的範例來說就像下面這樣
function mailto($from,$to,$subject,$msg,$filename=")
{
$mailto = “;
if(count($to) > 1)
for($i = 0;$i < count($to);$i++)
$mailto .= “$to[$i],";
else
$mailto = $to;
$boundary = uniqid(“"); // 產生分隔字串
$subject = ‘=?utf-8?B?’.base64_encode(“$subject").’?=’; // 標題加密(防亂碼)
$headers = “;
$headers .= “MIME-Version: 1.0\r\n";
$headers .= “Content-type: multipart/mixed; boundary=\"$boundary\"; charset=\"UTF-8\"\r\n"; //宣告分隔字串
$headers .= ‘From:’.$from."\r\n"; // 設定寄件者
$headers .= “X-Mailer: PHP/".phpversion()."\r\n";
$body .= “–$boundary\r\n";
$body .= “Content-type: text/plain; charset=\"UTF-8\"\r\n";// 信件本文header
$body .= “Content-Transfer-Encoding: 8bit\r\n\r\n";// 信件本文header
$body .= $msg."\r\n"; // 本文內容
//附加檔案處理
if(!is_array($filename))
$files[0] = $filename;
if( count($files) != 0)
{
for($i = 0;$i < count($files);$i++)
{
$mimeType = mime_content_type($files[$i]); // 判斷檔案類型 ,php.ini要開啟php_mime_magic.dll
if(!$mimeType)
$mimeType = “application/unknown"; // 若判斷不出則設為未知
$data = chunk_split(base64_encode(file_get_contents($files[$i])));
$file = basename($files[$i]); //傳回不包含路徑的檔案名稱(mail中會顯示的檔名)
$body .= “–$boundary\r\n";
$body .= “Content-type: $mimeType; name=$file\r\n";
$body .= “Content-transfer-encoding: base64\r\n";
$body .= “Content-disposition: attachment; filename=$file\r\n\r\n";
$body .= “$data\r\n";
}
}
$body .= “–$boundary–“;//郵件結尾
mail($mailto, $subject, $body, $headers); // 寄出信件
}
perl範例
sub mailto
{
my ($from,$to,$title,$content,$file) = @_;
my $id = “;
for(my $i = 0;$i <= 20;$i++){$id .= chr(97 + int(rand(26)));}
$title = ‘=?utf-8?B?’.substr(encode_base64($title),0,-1).’?=’;
my $header = “X-Priority: 3\r\nMIME-Version: 1.0\r\nContent-Transfer-Encoding: 8bit\r\nContent-type: text/html;charset=utf-8
Content-type: multipart/mixed; boundary=\"$id\"; charset=\"UTF-8\"\r\nFrom: $from\r\nSubject: $title\r\nTo: $to\r\n–$id
Content-type: text/plain; charset=\"UTF-8\"\r\nContent-Transfer-Encoding: 8bit\r\n\r\n";
#夾檔
if($file ne “){
my $filename = basename($file);
my $data = encode_base64(`cat $filename`);
$content .= “\r\n\r\n–$id\r\nContent-type: application/unknown;name=$filename\r\nContent-transfer-encoding: base64
Content-disposition: attachment; filename=$filename\r\n\r\n$data";
}
$content .= “–$id–“;
open(MM,"|/usr/lib/sendmail -oem -oi -f ‘$from’ -t ‘$to'");
print MM “$header$content";
close(MM);
}
來源出處:
https://bbs.csdn.net/topics/80114188
procedure TFormMain.SendMail(Recipient, Address: string);
const
sStars = ‘BackgroundStars.jpg’;
var
AdressItem: TIdEMailAddressItem;
AFile: string;
AMessage: TIdMessage;
ASMTP: TIdSMTP;
AStream: TMemoryStream;
Attachment: TIdAttachment;
IdBody: TIdText;
IdHTML: TIdText;
idStars: TIdAttachment;
resStars: TStream;
TempFile: TStream;
begin
Screen.Cursor := crHourGlass;
AFile := FileListBox.FileName;
if FileExists(AFile) then begin
AMessage := TIdMessage.Create(nil);
AMessage.NoDecode := False;
AMessage.NoEncode := False;
AMessage.ContentType := ‘multipart/mixed’;
AMessage.Encoding := meMIME;
AMessage.MsgId := ‘PrettyPic’;
AMessage.References := ChangeFileExt(ExtractFileName(AFile), “);
// Set recipients.
AdressItem := AMessage.Recipients.Add;
AdressItem.Name := Recipient;
AdressItem.Address := Address;
// Set subject.
AMessage.Subject := ‘Hello.’;
// Set sender.
AMessage.Sender.Name := ‘Workshop Alex’;
AMessage.Sender.Address := ‘someone@somewhere.org’;
// Set from.
AMessage.From.Name := AMessage.Sender.Name;
AMessage.From.Address := AMessage.Sender.Address;
// Create plain body.
IdBody := TIdText.Create(AMessage.MessageParts);
IdBody.ContentType := ‘text/plain’;
IdBody.Body.Add(‘Hello, friends.’);
IdBody.Body.Add(“);
// Add more to the plain-text bodypart.
// Create HTML body.
IdHTML := TIdText.Create(AMessage.MessageParts);
IdHTML.ContentType := ‘text/html; charset=US-ASCII’;
IdHTML.ContentTransfer := ‘7bit’;
IdHTML.Body.Add(‘<html>’);
IdHTML.Body.Add(‘ <head>’);
IdHTML.Body.Add(‘ <title>Hello</title>’);
IdHTML.Body.Add(‘ </head>’);
IdHTML.Body.Add(‘ <body title="‘ + AMessage.References + ‘" background="cid:BackgroundStars">’);
IdHTML.Body.Add(‘ Hello, friends.<br>’);
IdHTML.Body.Add(‘ <br>’);
IdHTML.Body.Add(‘ <img src="cid:PrettyPic" alt="‘ + ExtractFileName(AFile) + ‘" name="‘ + ExtractFileName(AFile) + ‘" title="Just an image included.">’);
IdHTML.Body.Add(‘ </body>’);
IdHTML.Body.Add(‘</html>’);
// Add the attachment. Don’t forget the extra headers!
Attachment := TIdAttachment.Create(AMessage.MessageParts, AFile);
Attachment.ExtraHeaders.Values[‘Content-ID’] := ‘<PrettyPic>’;
Attachment.ContentType := ‘image/jpeg’;
idStars := TIdAttachment.Create(AMessage.MessageParts, ExtractFilePath(ParamStr(0)) + sStars);
idStars.ExtraHeaders.Values[‘Content-ID’] := ‘<BackgroundStars>’;
idStars.ContentType := ‘image/jpeg’;
// Now send the thing…
ASMTP := TIdSMTP.Create(nil);
ASMTP.Host := ‘mail.whatever.org’;
ASMTP.Port := 25;
ASMTP.AuthenticationType := atNone;
ASMTP.Connect;
try
ASMTP.Send(AMessage);
except
on E: Exception do ShowMessageFmt(‘Error: %s’, [E.Message]);
end;
ASMTP.Disconnect;
AMessage.Free;
ASMTP.Free;
end;
Screen.Cursor := crDefault;
end;
來源出處:
https://www.itread01.com/content/1548048812.html
用image欄位儲存這些文件。
var
word_stream: TMemoryStream;
filename: string;
begin
if odgDoc.Execute then//odgDoc:OpenDialog
begin
filename := ExtractFileName(odgDoc.FileName);
word_stream := TMemoryStream.Create;
word_stream.LoadFromFile(odgDoc.FileName);
word_stream.Position := 0;
cdsPACT.Append
cdsPACT.FieldByName(‘DocName’).Value := filename;
TBlobField(cdsPACT.FieldByName(‘PactText’)).LoadFromStream(word_stream);
cdsPACT.Post;
word_stream.Free;
end;
end;
